A Captivating Water Cycle Bag Experiment For Kids Of All Ages

A Captivating Water Cycle Bag Experiment For Kids Of All Ages
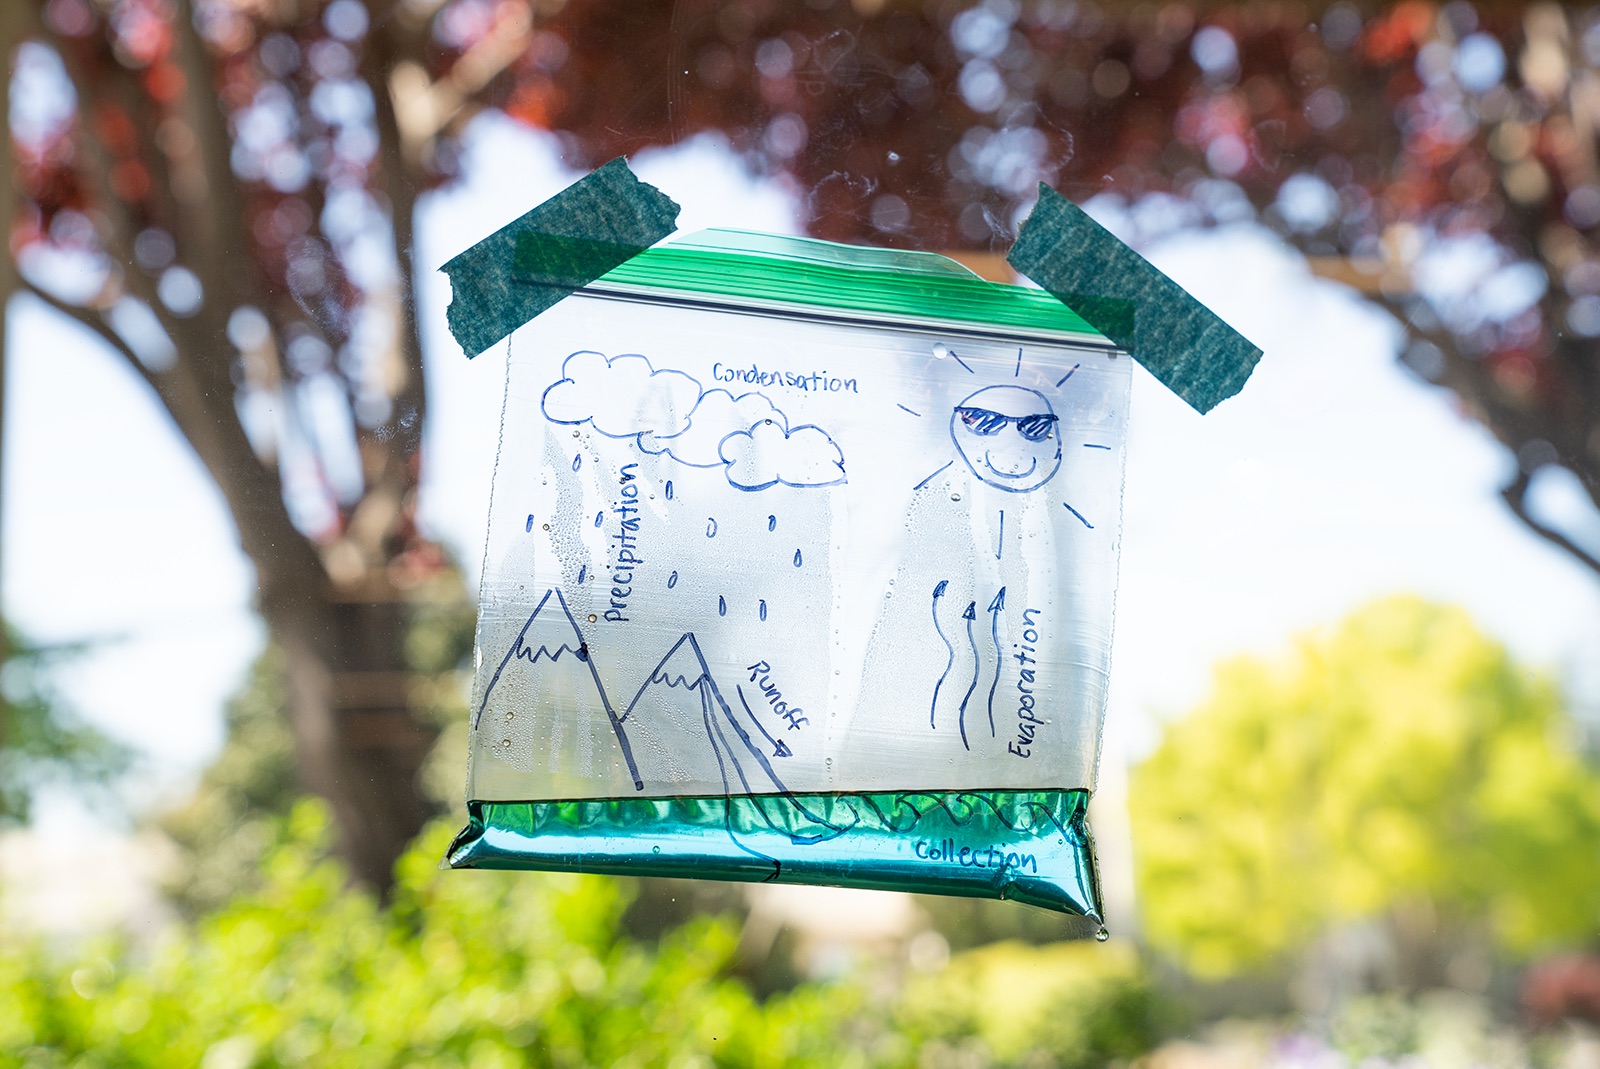
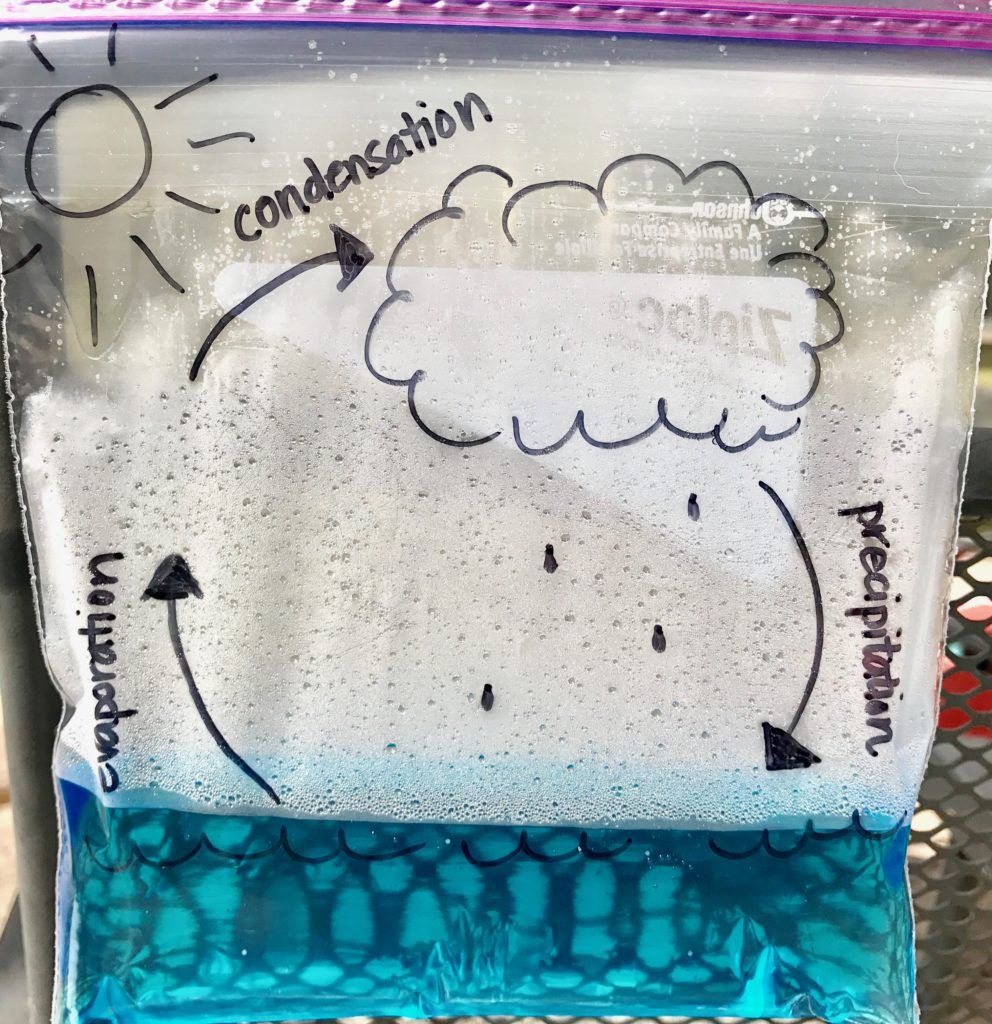
1 Gather your materials. 2 Smooth the Ziploc ® brand bag out on a flat surface. Use the permanent marker to draw the water cycle from the Water Cycle Printable on the bag. (Draw carefully to avoid puncturing the bag.) 3 Pour ⅓ cup of water into the bag (avoid filling the bag more than halfway).
Water Cycle Bags DIY for Beginners KiwiCo
Water Cycle in a Bag April 3, 2020 Emily from the SMO programs team loves rain and knows it's just one step on a larger process called the water cycle! The water cycle is the path water follows as it moves from the surface of the earth up into the atmosphere and back to the ground again.

🌧 Water Cycle in a Bag Weather Activity for Kids w/ Free Worksheet
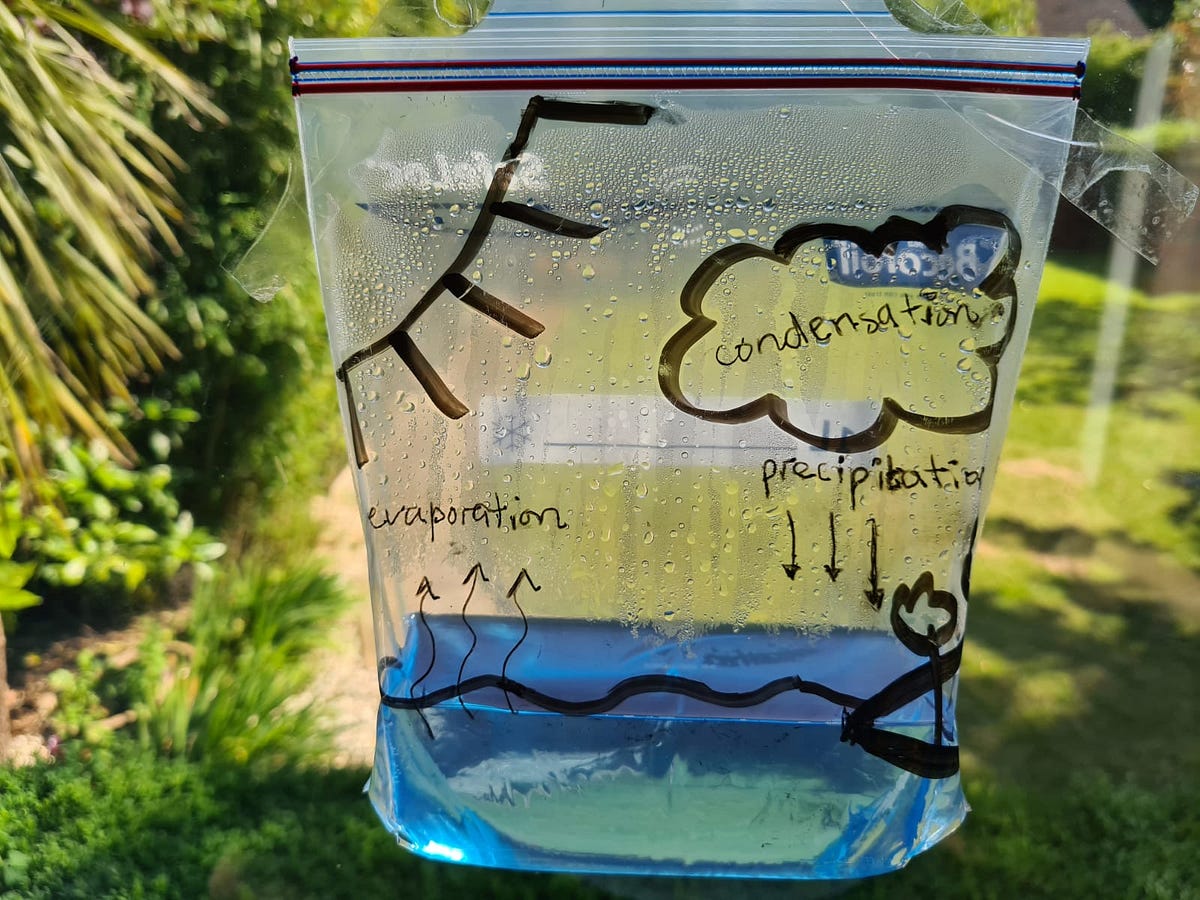
Fill a cup with water and add a few drops of blue food coloring. 3. Pour the blue-colored water into the bag and zip it tightly so no water escapes. 4. Using some clear tape, hang the bag outside or on a sunny window. 5. Check the bag after a couple of hours. You can also check again the next day.
Water Cycle in a Bag. Evaporation, condensation, and… by Drax Drax Medium
This Water Cycle Bag Experiment is a great way to introduce them to science and all the ideas of the water cycle. If you love this experiment, check out these amazing fun weather activities for kids! One of the easiest science experiments for your youngest learners is a simple water cycle bag experiment.

Water Cycle in a Bag Playdough To Plato Preschool science, Weather activities for kids
0:00 / 2:33 Water Cycle_Water Cycle in a Bag George Mehler 10.6K subscribers 202K views 10 years ago Jared creates a water cycle in and makes it rain in a plastic bag. Will the blue water.

Water Cycle in a Bag Water cycle, Teaching science, Stem activities
Step 1: What You'll Need You need just a few common household items to create your water cycle display: Plastic zip lock-style bag Permenant marker (s) Water Blue food coloring Clear tape Step 2: Decorate the Bag Before you do anything else, decorate your bag!

Water Cycle InABag Experiment I Planned That
Step #1 - Draw the water cycle on your baggie. Using a permanent marker, draw a simple model of the water cycle on the outside of the plastic baggie. Step #2 - Add water to the baggie. Next, add about 2 inches of water to the bag. The exact amount isn't important, so there is no need to measure it.

Weather at Home Water Cycle in a bag FOX31 Denver
Pour ⅓ cup of water into the bag (avoid filling the bag more than halfway). Put one or two drops of blue food coloring into the water. Make sure to keep the bag upright. Find a sunny window and tape the bag up. Tape the bag at a slight angle to simulate the runoff and collection stages of the cycle.

Water Cycle in a Bag in 2021 Preschool science activities, Weather activities for kids, Earth
See the water cycle using just a plastic bag, water, permanent marker, and the sun in this #SMOatHome activity from Science Museum Oklahoma!
Water Cycle In A Bag Little Bins for Little Hands
Prep Work. Start the activity in the morning so you can observe the experiment over the course of the day. The activity works best on a sunny day. Flatten both plastic bags and decorate your bags with some elements of the water cycle (water, clouds, sun, etc.) with the permanent marker. Be careful not to poke a hole in the bags with the marker.

Water Cycle In A Bag Experiment for Preschoolers Preschool science activities, Preschool
Add 1/4 cup of water (or more depending on the size of your bag) to your ziplock bag and add a couple drops of blue food coloring to make the color pop and allow children to easily see the water collection at the bottom. It does help somewhat in seeind the evaporated water droplets that gather the top too. Seal the top. Water cycle for kindergarten
Water Cycle in a Bag. Evaporation, condensation, and… by Drax Drax Medium
Procedure: 1. Use your permanent marker to draw a sky with clouds and a sun towards the top of your bag. 2. Add some water so that it forms a body of water at the bottom of your bag. Add food coloring now, if using. 3. Seal your bag and hang or place it on or near a sunny window. 4.

Water Cycle in a Bag Science experiments kids, Water cycle, Science for kids
Simple & Easy Hands-on Science | Water Cycle in a Bag Learn Ahn 572 subscribers Subscribe Subscribed 209 Share 33K views 3 years ago Physical Science A simple & easy way to review the concepts of.

Malia Hollowell on Instagram “kinnectkids take on our water cycle in a bag is on point!! Now
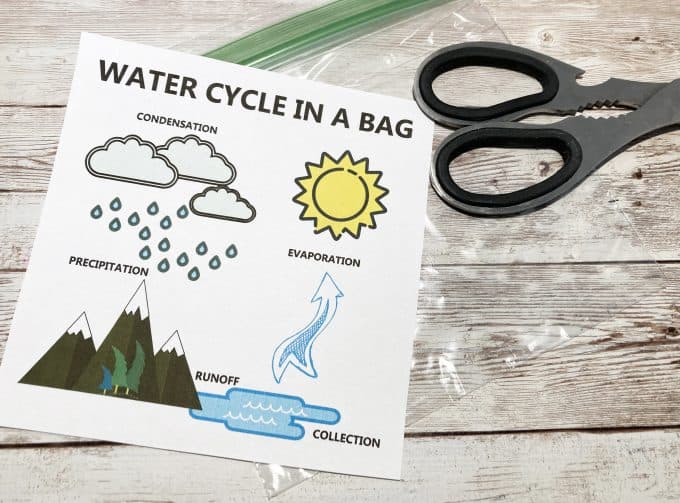
Tape INSTRUCTIONS STEP 1: Print out and color the water cycle worksheet. STEP 2: Cut the water cycle diagram out and tape it to the back of a zip top plastic bag. STEP 3: Mix 1/4 cup of water with 2 drops of blue food coloring and pour into the bag and seal. STEP 3: Tape the bag to a sunny window and wait.
Grade 2 with Mrs. Wickson! Experiment 2 Water Cycle in a Bag
Step 1: Place the ziplock bag or resealable plastic bag on a flat surface. Using the permanent marker, draw the water cycle on the bag without puncturing it. Step 2: Add a drop of blue food coloring to the ⅓ cup of water and stir it. Step 3: Hold the plastic bag upright and pour the blue colored water into it. Ensure that the bag is only half full.

Pin by Katherine Dobbie on Science Science activities for kids, Water cycle, Science fair
This Water Cycle in a bag experiment is a fantastic way for children to explore this science topic in a fun way. By completing this experiment, they'll learn how the Water Cycle works in miniature form. Show more Related Searches water cycle water cycle ks2 water cycle experiment water cycle activities water cycle in a bag science experiments
